Sunday, August 26, 2012

Classroom Tour :)

Sooo....I totally forgot to take pictures of my classroom BEFORE the kids came!! So, you may have to excuse some of the mess! I took these pictures Friday after school and I just didn't have the energy to clean! But here we go anyways :)
This is the look from the door:
 here is the look from my desk:
When you open the door to my classroom and look to the left, I have the students kitchen area that they use during indoor recess (if it is raining) or free choice play, which we are lucky enough to have for 30 minutes at the end of the day:
Straight ahead from the classroom door I have two laptops on top of a sand table, that I desperately want out of my classroom haha we never use it!
Here is the students writing center. I have all of their writing options in the red organizational chart (from Lakeshore Learning) on the wall. They can choose what they want to work on and then they sit at the table seen in the second picture. At this table I also have writing prompts, thematic words, different kinds of paper, markers, glitter pens, colored pens, etc. I want to make writing fun! Next to the writing center I also have the pocket chart center. Students will sit on the little cushions in the pocket chart center (from Lakeshore Learning). If there is an activity sheet to go along with their work, then I have clipboards available to them.

                                   
This is the sink area, you can see my color and shape posters :)
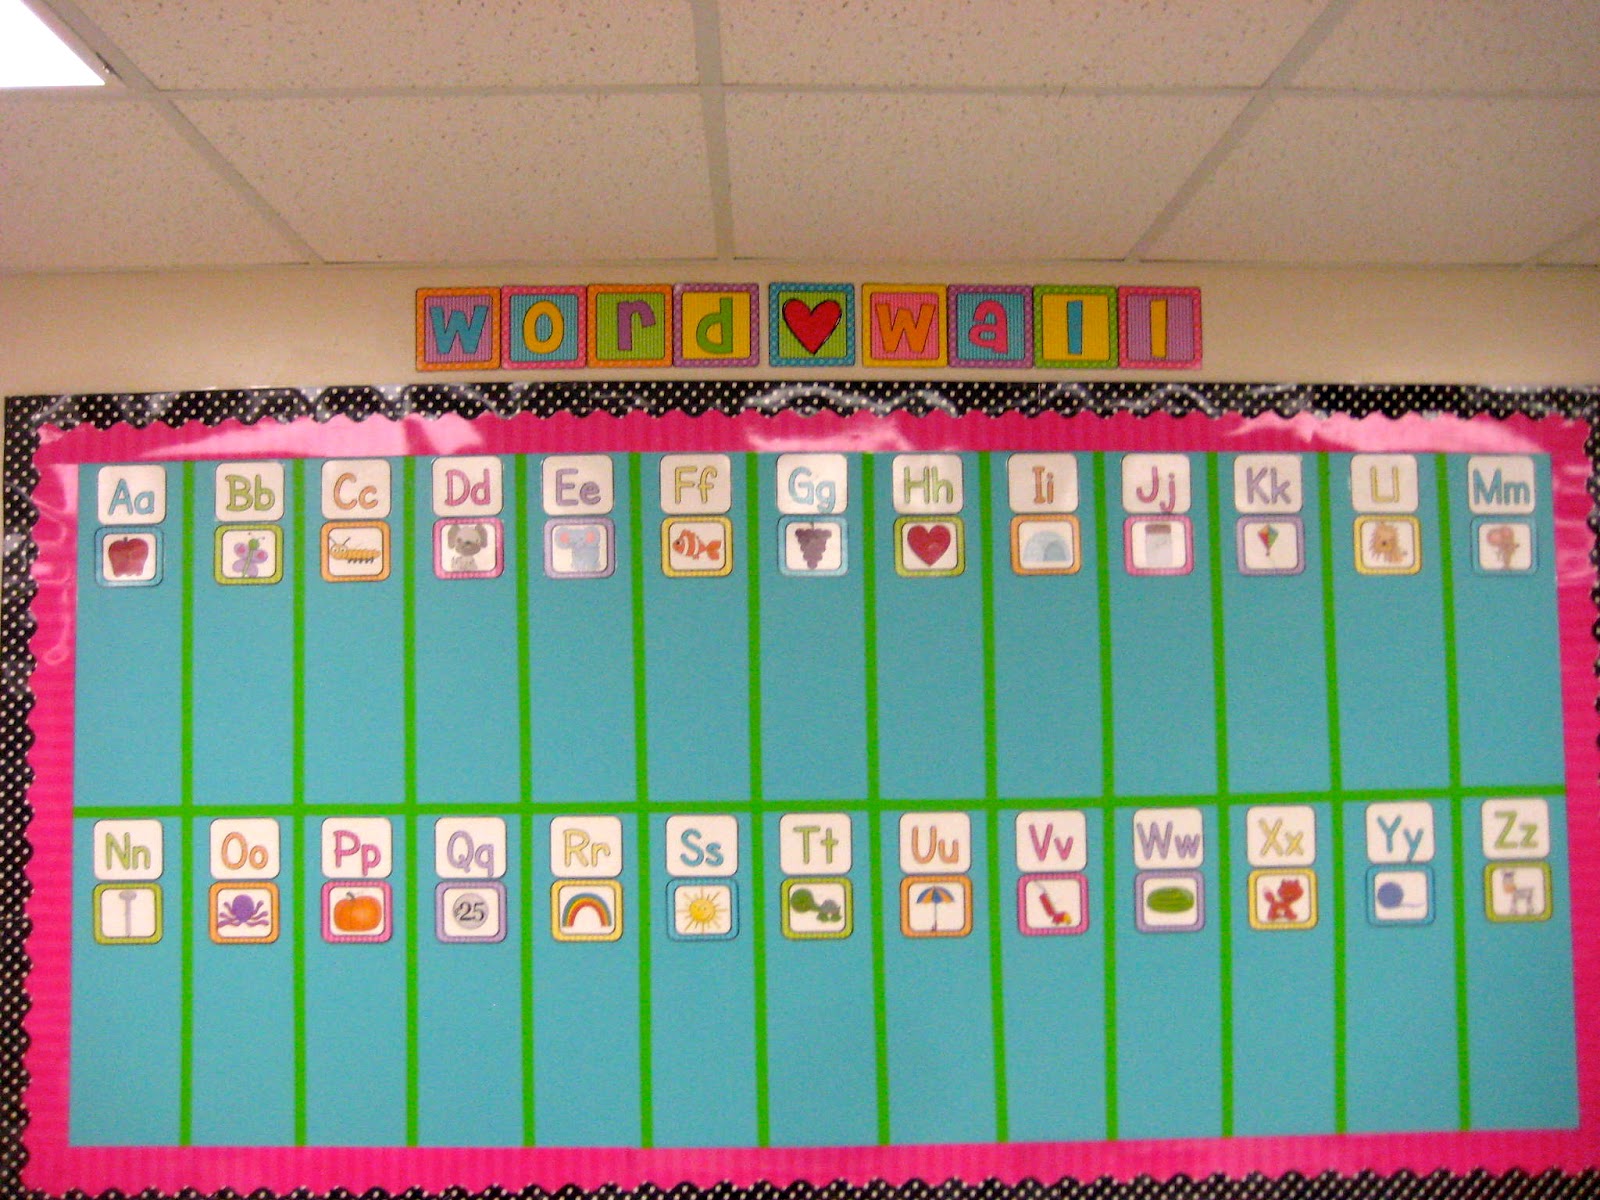
Here is the other computer area. I have 2 desktops and another laptop for the students to use. I also have our word wall in the center of the back wall. This way all of the students can see it :) The title was made using my A to Z letters here
I have our classroom library tucked into the back corner. I wanted this to be a quiet place for the children and have a cozy feel. The chairs are actually from The Container Store (but, sadly, I haven't seen them there again since I got them!)


 My 'Great Work' bulletin board. Also made using the letters found HERE
Next to the library I have a wonderful storage shelf. This really helped me organize all the back to school supplies quickly!
 I also have a long back counter where I have my reading group bins, reading series, and my organizational bins with the plans/activities for the week. This is also my reading group table. The bins on the table right now are for my centers on Monday.
I have these pencil bins on my desk. Right now, I am the only one sharpening pencils, but the kids bring me the ones that need to be sharpened :)
 Here is my listening center. I keep all the books on c.d. inside the crate seats. The headphones I have are wireless which is amazing! 
Lastly, here is our carpet area. You can see our thematic books on the whiteboard shelves and our calendar sentences. I also have the ABC posters and number posters from Tammy at Live, Love, Laugh in Kindergarten. Love her :)
You can kind of see my rocking chair where I sit and the big book stand. In the background you can see where I put my students' birthdays and the Common Core posters from Deanna Jump.
 Here is our calendar. The calendar is from Lakeshore, but I, of course, had to change all their cards out for polka dotted ones :)
 Then, I have the jobs right by the carpet so I can easily change them out on Mondays...the letters are, again, from HERE
If you are still with me ;) Then, on your way out of my the classroom you would see my dismissal chart, behavior chart, and my 'star students' where the children try to earn 10 stickers for treasure box!


Thanks for stopping by and checking out my classroom!

Saturday, August 18, 2012

Back to School Blog Hunt: Thematic Word Work Cards

I reallllllly can't believe its back to school time already! I am totally in denial. I met my new class on Friday and we start on Monday---ahhh!! This weekend I didn't make anything too cutesy to decorate my room with, but I did make some more word cards for you all!!
I am excited to use some of the daily 5 in my room this year. I set up the word work station already. I put play-doh, magnetic letters, white boards, chalk boards, pom-poms, pipe cleaners, etc. all in the center for students to use to spell words with. I also added a couple of these sight word cards and fun word cards to the center. I cut the cards apart on the lines and added them onto a binder ring. I figured that even if the students can't read all of the words, or any of the words, they can still start copying the words in the word work center and start getting familiar with them.


Then, when I was setting up my writing center I realized that I wanted these words there as well! We need 'interactive' bulletin boards this year, so I am going to have a hook on the board and hang these cards on the hook from the binder ring. Students can grab the cards that they need when they are writing stories, cards, etc. 
I thought it would be a good idea to add new cards to the center as the year progresses. For September I have 'back to school' words and 'apple' words. 
I will add new cards every month :) You can click on any of the pictures in this post to grab yours!  :)
Enjoy!! and have a GREAT school year!!

Sunday, August 12, 2012

Classroom Decor Galore!

Today is my last day of summer! I can't believe the time went by so fast! I have to say that I have had one of the best, most relaxing summers! I am just not totally ready for it to be over! 
I am excited, and a little stressed, about this pre-planning week. I have lots of meetings and things to plan. But, my favorite part will be finishing up my classroom decor :)
I wanted to let you know sooner than later (because they are all on sale right now!!) some of the classroom decor packs I have in my store. 
My room this year is all bright colors and polka dots! I love it! Here are some of the bright polka dot packs I have...
I do know that not everyone is using these colors! So I converted some of the packs to primary colors as well!!
If there is something you need in primary that I have not already converted over...please let me know :)
I also have my units on sale...here are just a few...

Just click on either of the pictures below to check the items out in my store. Everything is 28% off right now!! Don't forget to use the discount code at checkout: BTS12
There is also a FABULOUS giveaway ending at midnight tonight! How great would that be to win something right before school starts?! Just click on the picture below to enter:

Tuesday, August 7, 2012

An Update on My Room and a Little Freebie :)

I was able to get a couple more things done in my classroom this morning :) We actually go back on Monday of next week and then students will return to school on August 20th
I hung up my 'How We Get Home' clip chart. I love it! It matches the rest of my polka dots perfectly and it is going to be so helpful with dismissal. I get so many notes with a change of dismissal for the day and this will be the perfect way for me to keep track of it all. As soon as I get the note in the morning, I will move that students clip to their new dismissal. It will also be great for subs! They will be able to stand right at the doorway and double check all of the students dismissal :)
My school is huge! So we have 2 different carpools and 2 different places that students can be dismissed for walkers/bikers as you can see above. I created additional dismissal tags and have them all here:

If you buy the pack and there is a dismissal tag missing, just shoot me an email and I will make it for you :)

I also hung up my word wall! I love how it came out! :) It did take me a little while to measure it, but the time was well worth it! I got the letters for the word wall words from Tammy over at Live, Love, Laugh and then I added on my letters to the top for my 'Word Wall' title.


I also added those letters to my 'Star Students' board and my writing, poetry, and reading centers too! They look great and match my room perfectly!! You can use these letters to create anything you want! The possibilities are endless :)
I am in the process of making a 'Miss Clabby' banner using them! It is looking fabulous ;)
You can find the letters here:
and you can find Tammy's word wall letters/pictures here:

Now it is time for your freebie :) I bought 3 bins from Bed, Bath, and Beyond (only $5 each) and created little tubs around the room to keep me organized. I made one for our reading buddies:
another for the clipboards:
and lastly, I made one for the students' to add their library books when they are finished with them:
I printed the letters out on 8 1/2x11 label paper that I bought from Office Depot. Then I cut the letters out, peeled the backing off, and stuck them right on! I love the way they look! Last year I used a paint marker to write on the bins, but I like this look better!
The paper is a little pricey (I think I paid $11 for 25 sheets) so I squished all of the letters onto 2 pages so I wouldn't waste any paper!! If you want to grab your letters just click on any of the pictures above :) I hope you are able to use them!!

Saturday, August 4, 2012

Pom-Poms!

At my school we really can't hang things from the ceiling. They say its because of fire codes and because it may let off the alarms (or something like that!). But, I HAD to have pom-poms in my classroom library!! So I figured I could get away with a couple small ones :) I decided to make mine out of tulle instead of paper. I was just thinking that the paper ones would fade with the lighting in my room and collect dust, blah blah. The tulle was actually only $2 a yard at Jo-Ann Fabrics and you only need a yard for each pom-pom. I bought 2 yards of one color just because I wanted one a little bigger. 

You'll have to ignore the messy book bins they weren't done yet when I took this pic :)
I like how they came out. They are small, but they still work! I tried to take pictures as I was making these in case you were interested, but I kept getting distracted and skipped some steps! 

Hopefully this will all make sense:
1. Trace circles onto cardboard or poster board of various sizes depending on the size you want your pom-poms.
2. Cut all your circles out 
3. Place 2 circles of the same size on top of each other
4. Have your tulle cut into strips (about 3 inches wide) and start wrapping the tulle through the middle of your circle. Each time one strip runs out, just use another strip and cover the piece that you finished with (does that make sense? haha)
5. When you are finished tuck the last piece under another piece of tulle
6. Turn your circle onto its side. Take scissors and cut the tulle apart where the 2 cardboard circles meet (this is where I forgot to take pictures)
7. Your tulle is cut and you can start pulling the cardboard apart. Don't pull it all the way. Before you pull it apart, take a piece of string and tie a knot around the middle of your pom-pom. This will keep the pom-pom together. After you tie the knot then you can finish pulling off the card board.
Wa-La! Then you are finished!! :)

Before I left my classroom on Thursday, I decided to just empty out my entire desk and all of these drawers...
into one big mess...

I HAVE to start this year off organized!! Otherwise it will never get done! Anyone want to come clean?? :)

Don't forget to grab your to-do list HERE. (this is for a 5x7 frame)
and check out my new Common Core Math Hot Seats HERE